Over the past few days, ByteDance’s AI video model Seedance 2.0 has taken over the internet.
Seedance 2.0–generated videos are everywhere right now.
People are using it for movie-level chase sequences. Others are recreating the cinematic camera moves you’d normally see in big-budget commercials. Some are even turning it into period dramas, time-travel stories, or full-on martial arts action films—shots so clean and detailed that it’s genuinely hard to tell whether they were made by AI or filmed with real actors.
And honestly, that’s not an exaggeration.
With this update, Seedance 2.0 basically dropped the barrier to AI video creation straight to the floor.
Enough talking—let’s start with a quick montage ↓
So… how does it look?
Why did it explode in popularity so quickly? Because it finally cracked a problem that’s haunted creators for years: AI video used to be all about generation. Now, it’s about control.
Mix images, video, audio, and text freely—anyone can direct.
This time, things are different.
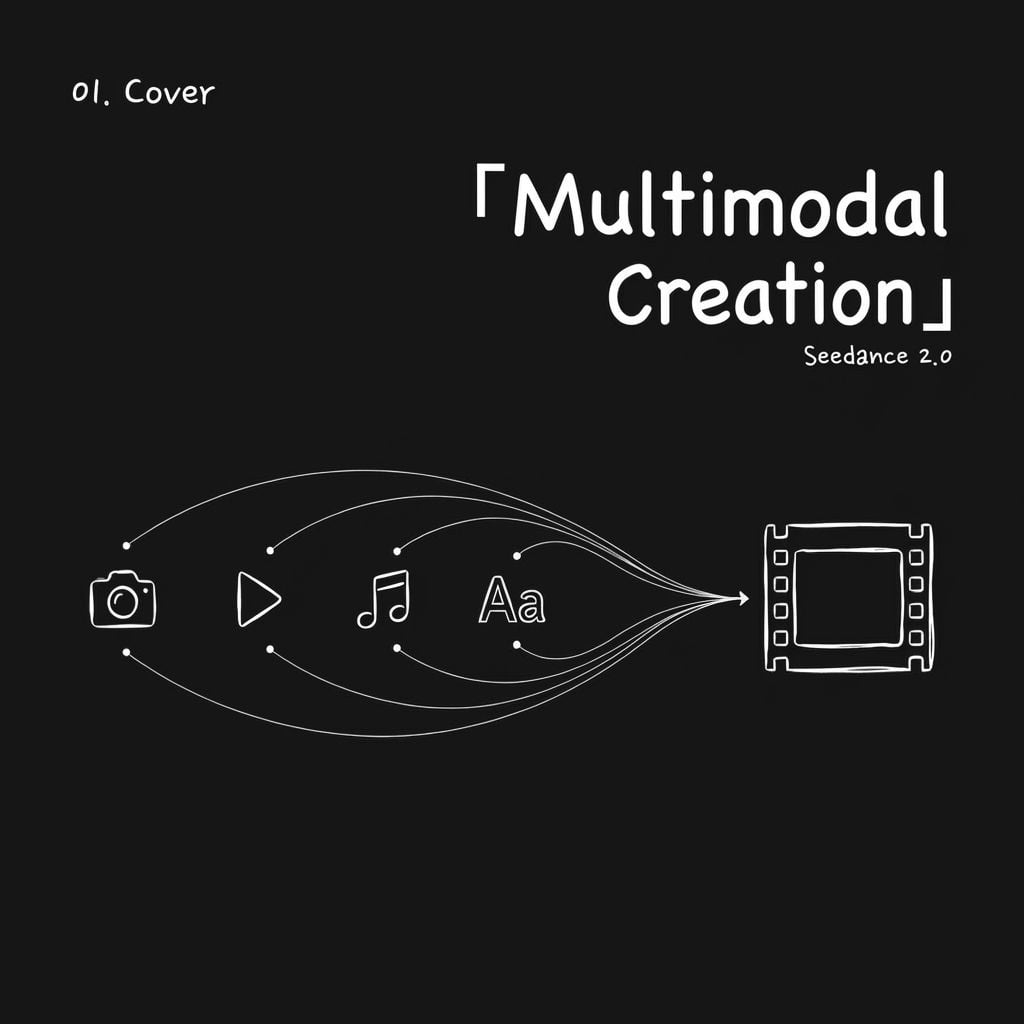
Seedance 2.0 is no longer just a text to video tool. It has evolved into a truly multimodal video creation platform that can understand creative intent.
You can feed it images, video clips, audio, and text at the same time. You tell it what each asset is supposed to do. It then blends everything together into a complete video.
Sounds a little abstract? That’s okay.
I’ll break down every feature and workflow step by step, and show you exactly how people are using it.
First Things First: What Can Seedance 2.0 Actually Do?
At its core, there is one key upgrade behind Seedance 2.0: multimodality.
With earlier AI video models, your input options were typically limited to just two things: either write a text prompt or upload a single first-frame image.
If you wanted to control camera movement, facial expressions, or background music pacing, everything had to be forced into text. Whether it worked or not depended almost entirely on how solid you were at writing prompts.
Seedance 2.0 addresses this by broadening inputs into four distinct modalities.
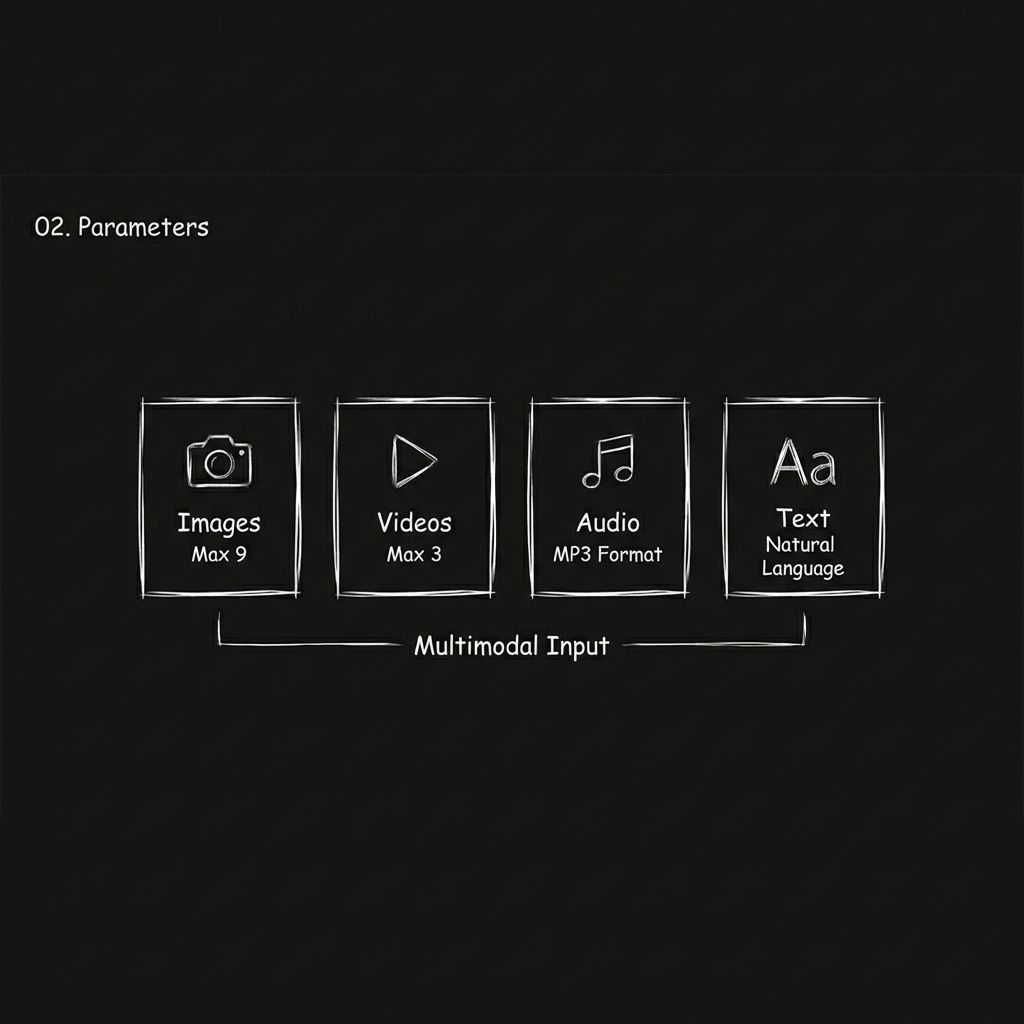
Images
You can upload up to 9 images. These can define character appearance, scene style, clothing details, product visuals, or even storyboard frames.
Video
You can upload up to 3 video clips, with a total duration of no more than 15 seconds. The model can reference camera movement, motion rhythm, and transition styles from these clips. In practice, this works like giving the model a visual sample to learn from.
Audio
MP3 uploads are supported, up to 3 files with a total duration of no more than 15 seconds. You can specify background music, sound effect styles, or even reference the narration tone from another video.
Text
You simply describe the visuals, actions, and pacing you want in standard natural language.
All 4 input types can be freely combined. The total number of uploaded files across all modalities is capped at 12.
The generated video can be up to 15 seconds long. You can choose any duration between 4 and 15 seconds, and the output comes with built-in sound effects and background music.
Put simply, you can finally direct AI like a real filmmaker:
- Images define the visual style.
- Video defines movement.
- Audio defines rhythm.
- Text defines the story.
Seedance 2.0 Input and Output Specifications
| Parameter | Description |
|---|---|
| Image Input | Up to 9 images |
| Video Input | Up to 3 clips, total duration no more than 15 seconds |
| Audio Input | MP3 supported, up to 3 files, total duration no more than 15 seconds |
| Text Input | Natural language description (English and Chinese supported) |
| Output Duration | 4 to 15 seconds |
| Audio Output | Built-in sound effects and background music |
| Total File Limit | Maximum of 12 files across all uploaded materials |
A quick tip before you begin: more reference materials do not always lead to better results.
Prioritize the assets that have the biggest impact on visuals or pacing, and allocate your upload slots wisely.
How to Use It: A Step-by-Step Walkthrough
Step 1. Choose the Right Entry Point
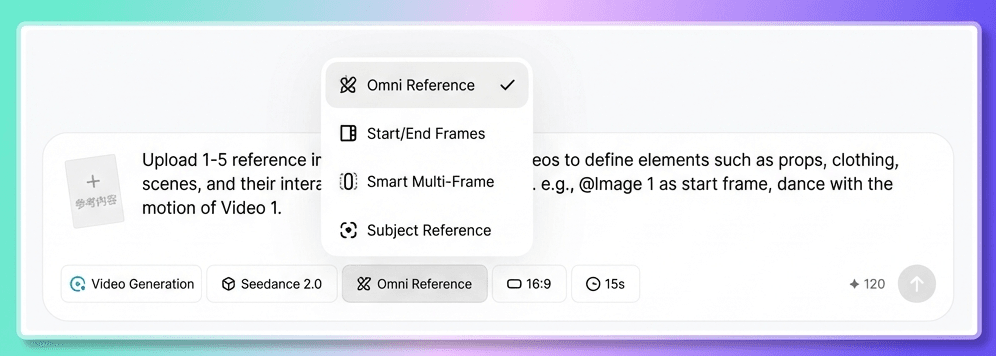
You can use Seedance 2.0 on Van Gogh Studio, including the Image to Video workflow. It is also available on Jimeng (Dreamina), ByteDance’s native creation app.
You will notice two distinct entry points.
- First and Last Frame: use this when you are uploading just one first-frame image along with a text prompt.
- All-in-One Reference: select this when you need multimodal inputs, like a mix of images, video, audio, and text.
How do you decide which one to use? Follow a simple rule: if your materials consist of just one image plus text, choose First and Last Frame; if you have more than one image, or if video or audio is involved, choose All-in-One Reference.
In most cases, All-in-One Reference is the better choice. It supports all types of reference inputs and is also where Seedance 2.0 can fully show its latest capabilities.
Step 2. Upload Your Assets
Click the upload button and select files from your local device. Images, video, and audio can all be dragged in directly. Once the upload is complete, all assets will appear in the input area. You can hover over each item to preview its content.
A quick reminder before uploading: think through which assets matter the most. You can upload up to 12 files in total, so prioritize the ones that have the greatest impact on visual style and pacing.
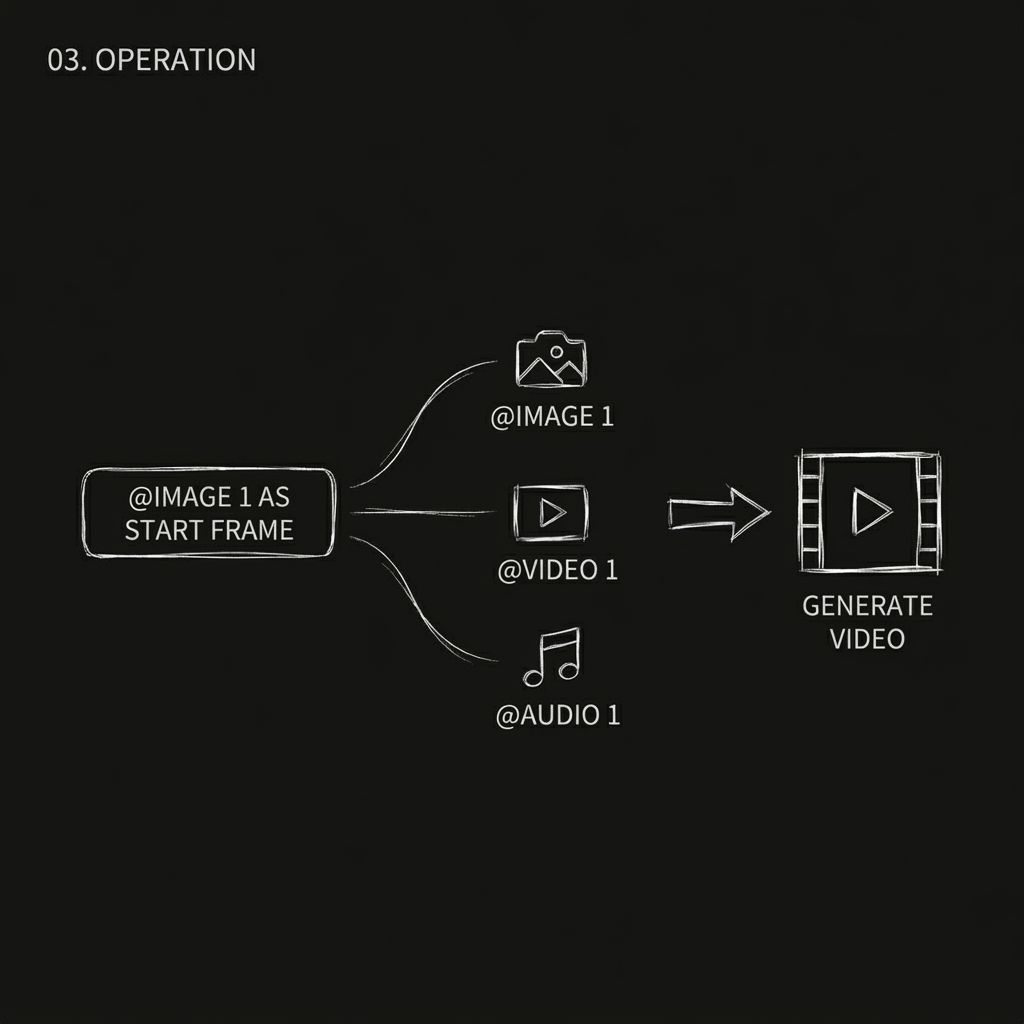
Step 3. Assign a Role to Each Asset Using “@” (Most Important Step)
This is the core interaction in Seedance 2.0, and also the part many beginners tend to overlook.
After uploading your assets, you need to explicitly tell the model what each one is for by using @asset name inside your prompt. The model does not guess. If you do not explain it clearly, it may use the assets incorrectly.
For example:
- @Image 1 as the first frame
- @Video 1 as camera reference
- @Audio 1 for background music
How to trigger “@”
Method 1
Type the “@” symbol directly in the input box. A list of all uploaded assets will appear. Click the one you want to reference, and it will be inserted into the prompt.
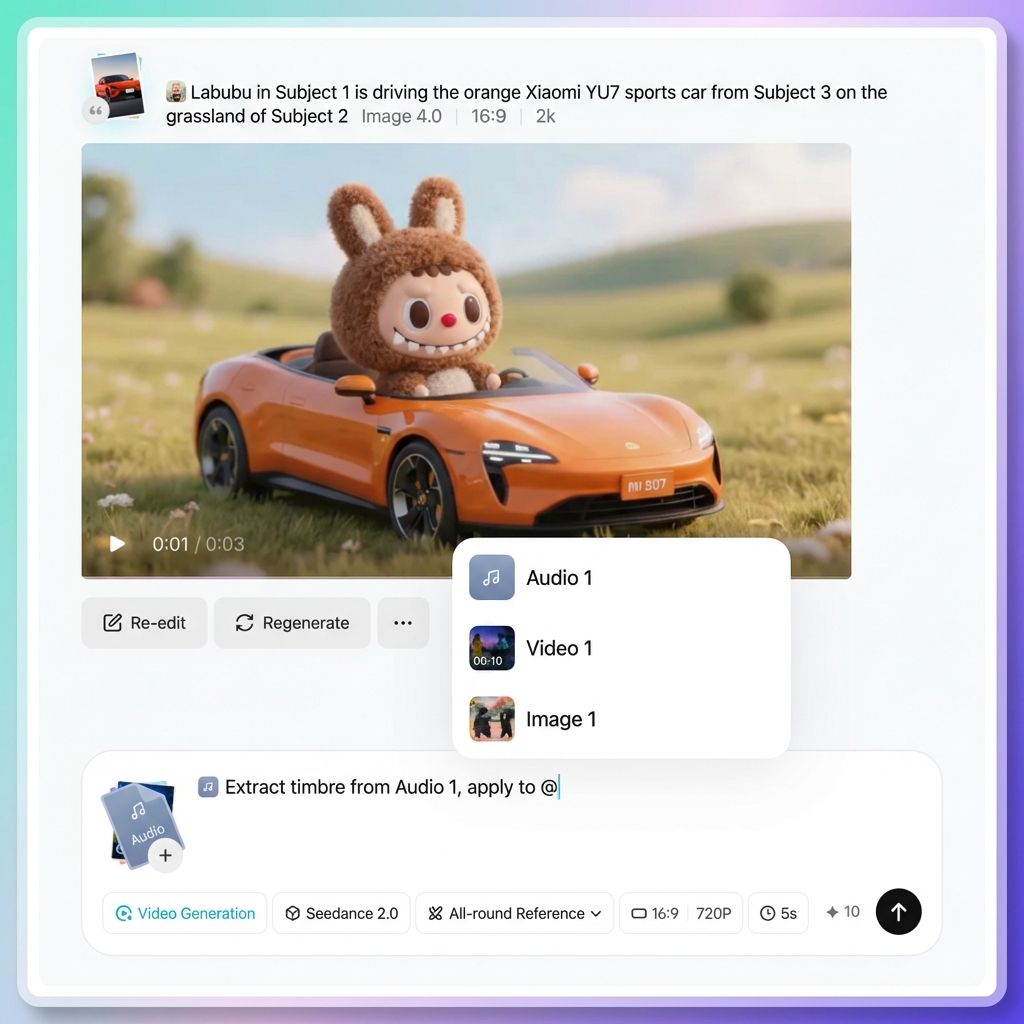
Method 2
Click the “@” button in the parameter toolbar next to the input box. This will also bring up the asset list.
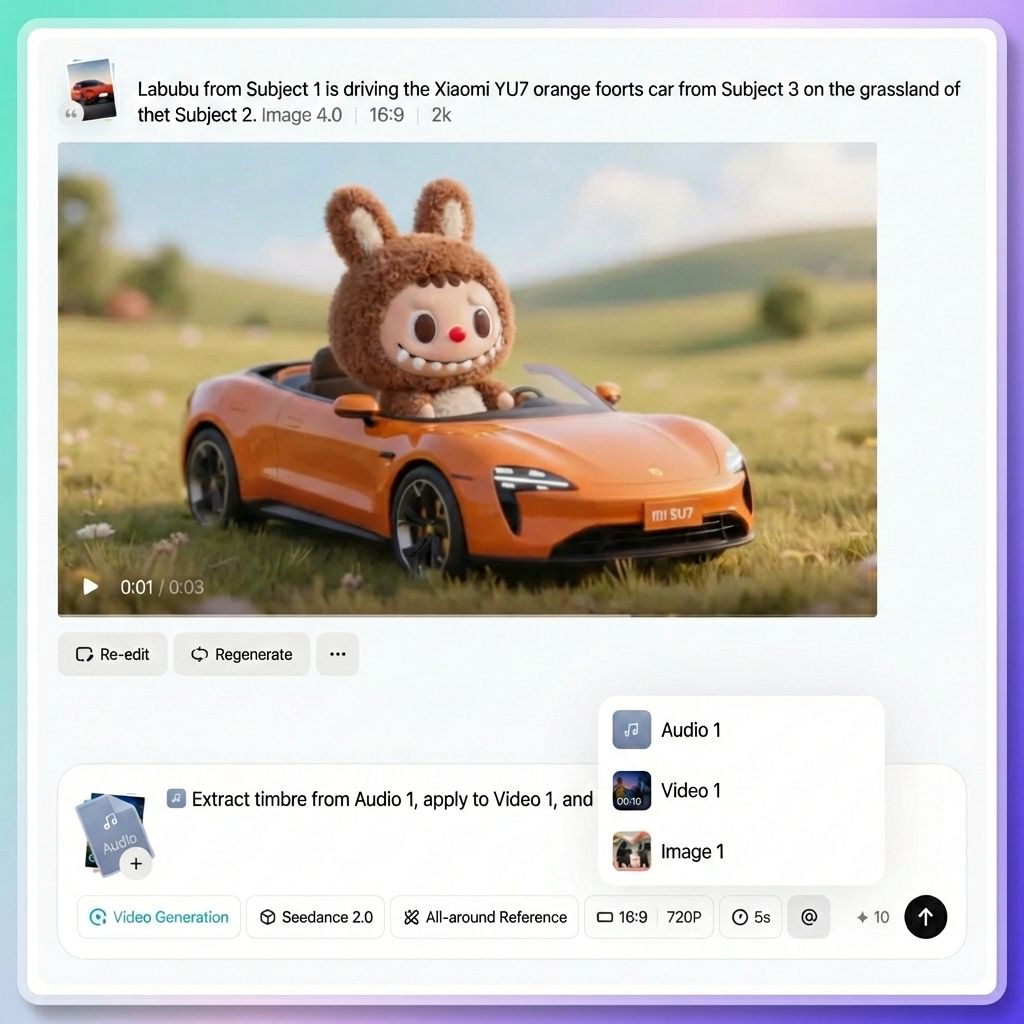
Examples of correct “@” usage
- Specify the first frame and reference: @Image 1 as the first frame, reference the camera language of @Video 1, and apply @Audio 1 for background music
- Specify character roles: The female character in @Image 1 as the main character, and the male character in @Image 2 as a supporting role
- Specify camera movement reference: Fully reference all camera movements and transitions from @Video 1
- Specify scene references: apply @Image 3 as the reference for the left scene, and @Image 4 as the reference for the right scene
- Specify action reference: The character in @Image 1 should reference the dance movements from @Video 1
- Specify voice reference: The narration voice should reference the voice tone from @Video 1
Common Pitfall to Watch Out For
When you are working with many assets, always double-check that every “@” reference matches the correct file. If you reference an image as a video, or accidentally assign Character A’s image to Character B, the output can quickly become chaotic.
You can hover your mouse over any referenced asset in the prompt to preview it and make sure everything is linked correctly.
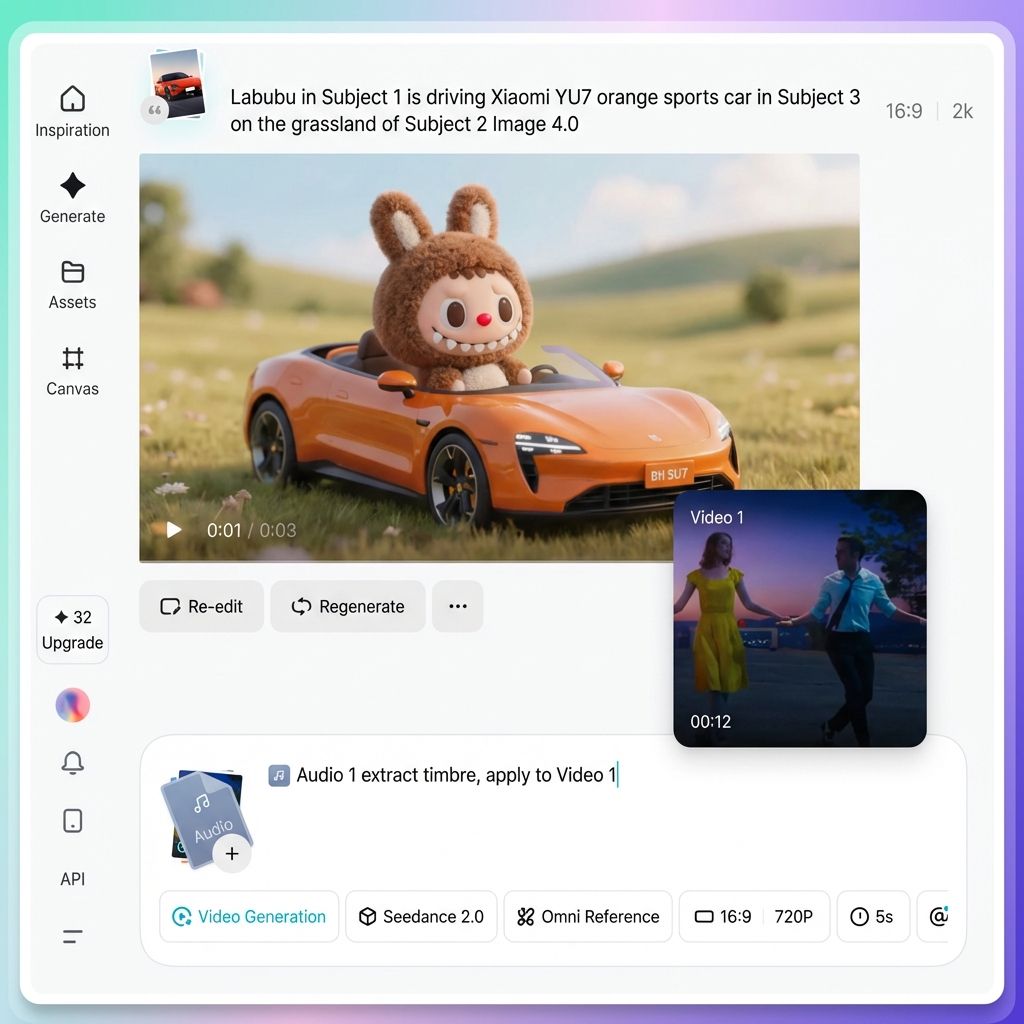
Step 4. Write a Clear and Effective Prompt
Once you have assigned roles to all assets using “@”, the rest is about describing the visuals and actions you want in natural language.
Here are four practical tips for writing better prompts.
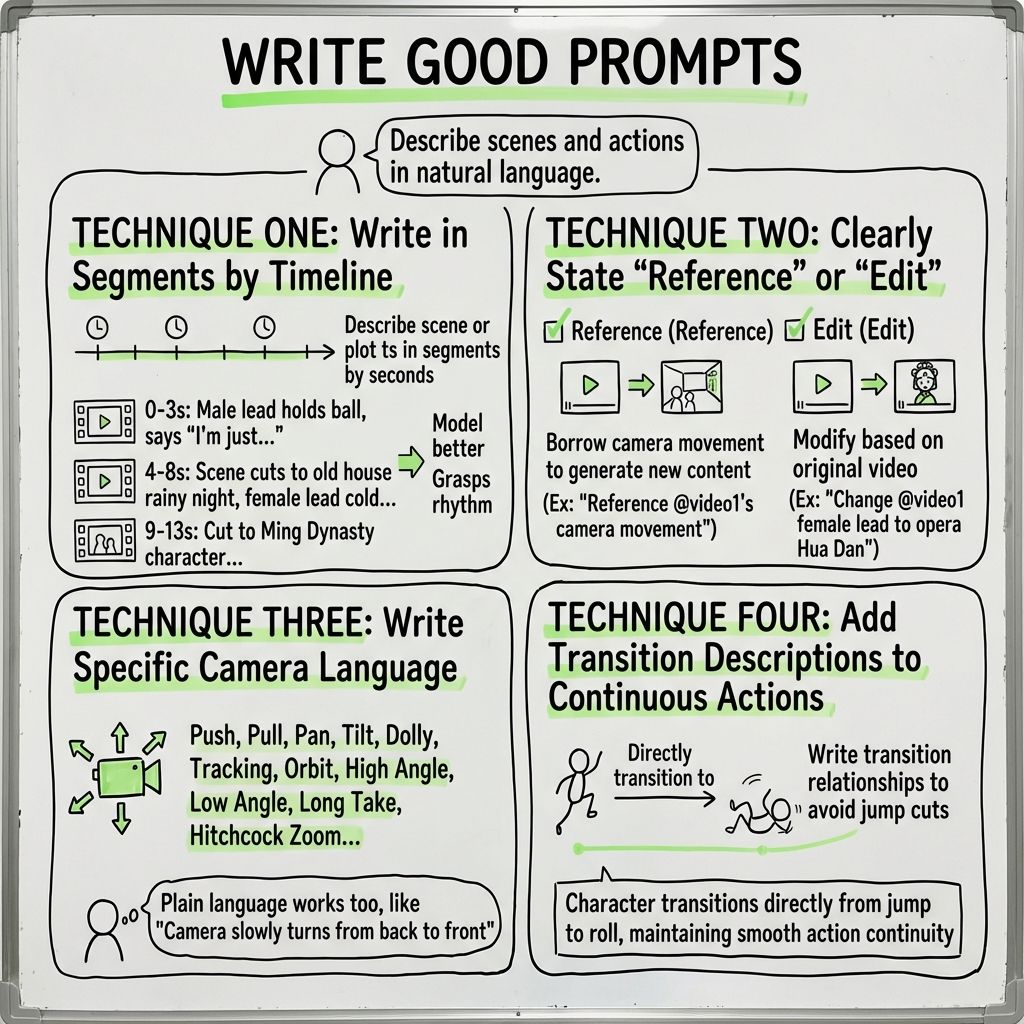
Tip 1. Write in a timeline structure
If your video contains multiple scenes or narrative shifts, it is best to describe them in segments based on time.
For example:
0–3 seconds
The male lead raises a basketball in his hand, looks up toward the camera, and says, “I just wanted a drink. Am I really about to time travel?”
4–8 seconds
A female lead in a traditional costume looks coldly toward the camera. The camera suddenly shakes violently. The scene cuts to a rainy night in an ancient residence.
9–13 seconds
The camera cuts to a character dressed in Ming Dynasty clothing…
Writing this way helps the model understand the pacing and content of each segment more accurately.
Tip 2. Be explicit about “reference” versus “edit”
These two concepts are not the same.
“Reference the camera movement of @Video 1” means using its style of camera motion to create new content.
“Replace the female character in @Video 1 with a traditional opera performer” means modifying the original video itself.
Be clear about which one you want, so the model can respond correctly.
Tip 3. Be specific with camera language
Do not worry about writing too much. The model’s understanding of camera language is now really strong.
Push, pull, pan, track, dolly, orbit, overhead shots, low-angle perspectives, continuous shots, Hitchcock zooms, fisheye optics—it understands all of these industry-specific terms.
If you are not familiar with technical terminology, that is fine too. Plain descriptions work just as well, such as “the camera slowly moves from behind the character to the front.”
Tip 4. Add transitions for continuous actions
If you want a character to perform a sequence of connected actions, make sure to describe the transitions clearly.
For example, “the character transitions directly from a jump into a roll, keeping the motion continuous and fluid.” This helps avoid unnatural jump cuts in the final video.
Step 5. Select the Duration and Generate
Choose the video length you need, anywhere between 4 and 15 seconds.
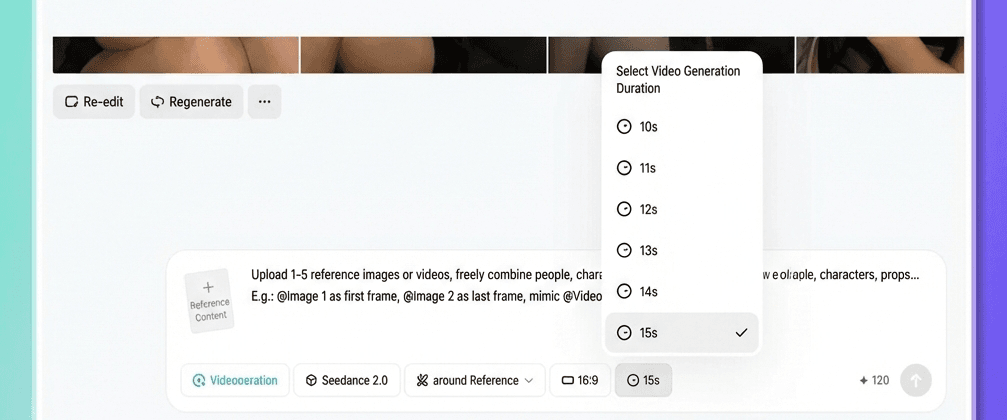
One important note:
If you are extending an existing video—for example, adding five extra seconds to the end of a clip—the duration you select here refers only to the newly generated portion, not the total video length. If you want to extend the video by five seconds, select five seconds.
Then click Generate and wait for the result.
AI outputs have an element of randomness, so even with the same inputs, each result can be slightly different. Simply pick the version you like best. If you are not satisfied, feel free to generate multiple times.
A Deep Dive into Seedance 2.0’s Core Capabilities
Below are the most powerful capabilities of Seedance 2.0. Each one comes with practical usage guidance and real examples.
Capability 1. A Major Leap in Visual Quality
Let’s start with the fundamentals.
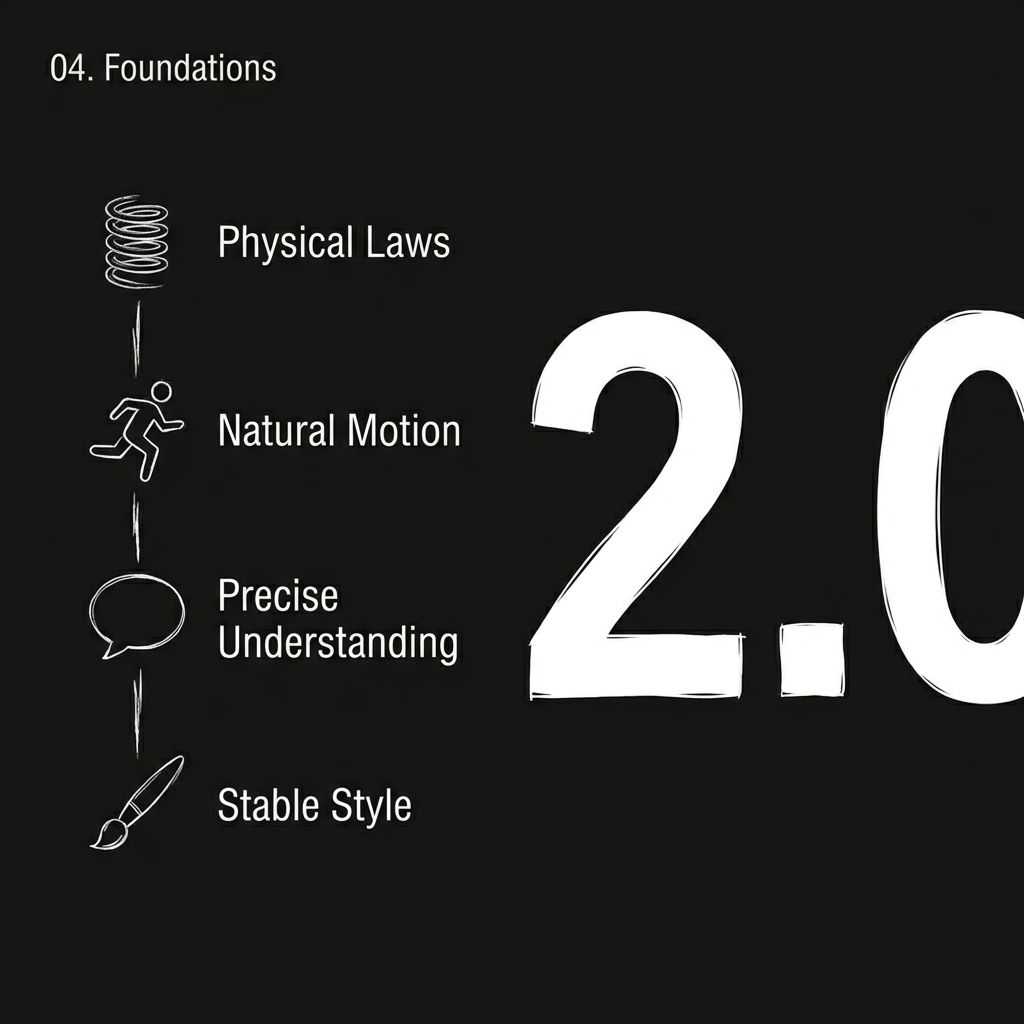
Seedance 2.0 has undergone a full foundational upgrade. Physics feel more accurate, movements are smoother, and visual styles remain more consistent throughout a scene.
At the most basic layer of image generation, there has been a qualitative leap:
- More realistic physics: Clothing movement, water splashes, and object collisions all behave more naturally.
- Smoother and more natural motion: Walking, running, and even complex actions no longer look stiff or mechanical.
- More accurate instruction understanding: If you say “a girl gracefully hanging clothes,” it genuinely understands what “gracefully” means.
- More stable style consistency: The visual style remains coherent from beginning to end, without a sudden shift.
Example Usage
A girl gracefully hangs clothes to dry. After finishing one piece, she takes another from a bucket and gives it a firm shake.
What does this mean in practice?
When you generate a scene like “a girl gracefully hanging clothes, then taking another from a bucket and shaking it firmly,” the movement of the fabric, the force in her arms, and the texture of the cloth all appear remarkably close to real footage.
More complex scenes are also well within reach.
The camera follows a man dressed in black as he runs away at high speed. The shot switches to a side tracking view. In his panic, he crashes into a roadside fruit stand, falls, gets back up, and continues running. A group of people chase him from behind.
Scenes involving chase sequences, collisions, and dynamic camera transitions can now be generated consistently in version 2.0.
This level of narrative complexity would have been almost unthinkable before. There are even more extreme examples. Some creators have used a single prompt to create a character inside a painting secretly reach out to grab a can of cola, take a sip, quickly put it back upon hearing footsteps, and then transition into a final shot that pushes in toward a black background featuring only the cola can with artistic subtitles.
Capability 2. Free Multimodal Combination
This is the most significant enhancement in version 2.0. You can now use any kind of material as a reference.
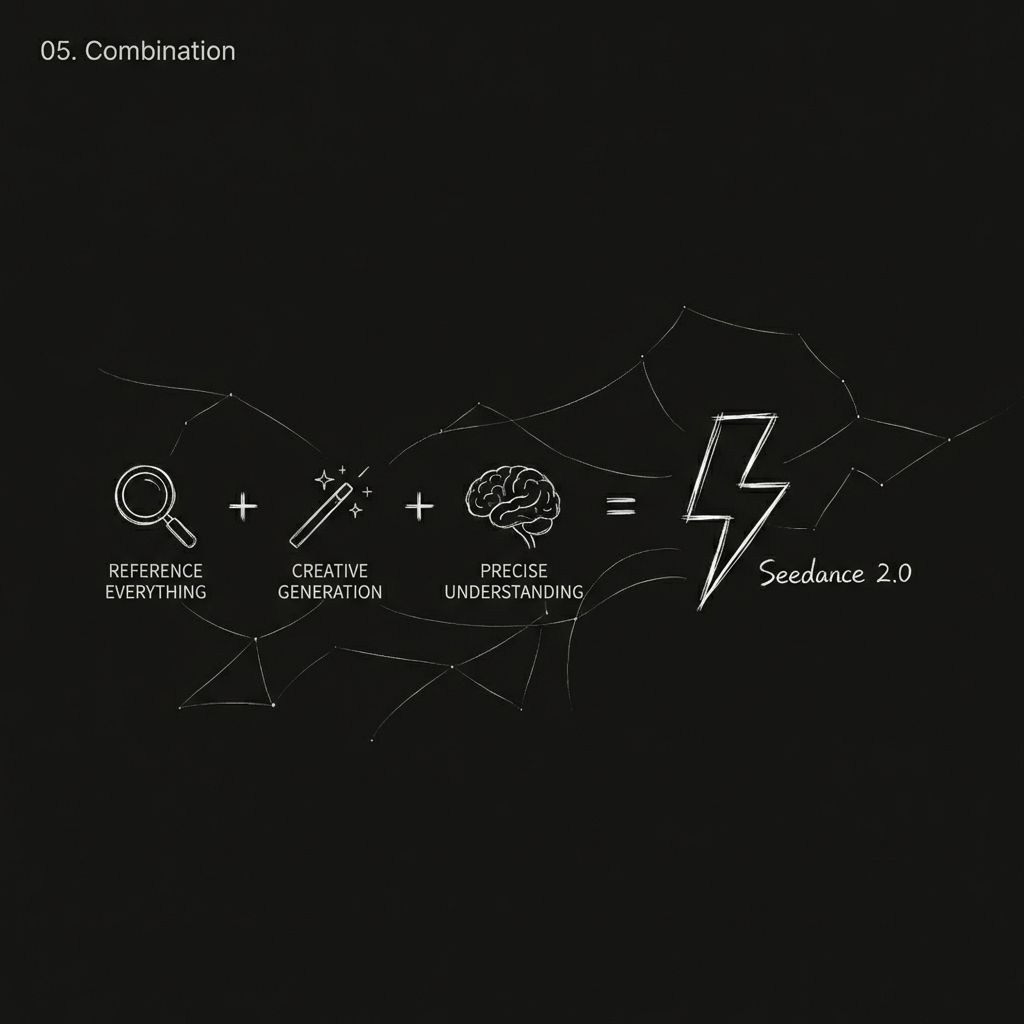
The formula can be summarized as follows:
Seedance 2.0 = multimodal referencing + strong creative generation + precise instruction understanding
You can reference:
- Actions, effects, and visual formats
- Camera movement and shot language
- Character appearance and scene style
- Sound and musical rhythm
Practical Tips
| What You Want to Do | How to Write the Prompt |
|---|---|
| Have a keyframe image and want to reference video motion | "@Image 1 as the keyframe, reference the camera shake from @Video 1" |
| Extend an existing video | "Extend @Video 1 by 5s" (set generation duration to 5s) |
| Combine multiple videos | "Place a scene between @Video 1 and @Video 2, the content is xxx." |
| Use the audio from a video | No need to upload audio separately—just reference the video directly |
| Continuous action | "The character transitions directly from jumping into a roll, keep the motion smooth and continuous" |
Capability 3: Major Improvement in Consistency
Anyone who has worked with AI video knows that consistency is the most frustrating issue.
Faces change between shots, product details disappear when the angle shifts, and scene styles suddenly jump.
Version 2.0 puts serious effort into solving this.
After uploading a character reference image, the person’s appearance, clothing, and posture remain consistent throughout the entire video. The same applies to product showcases. When rotating a bag from multiple angles, the front, side, and material details stay intact.
Elements That Can Stay Consistent:
- Facial features (facial structure, skin tone, expression style)
- Clothing details (texture, color, patterns)
- Brand elements (logo, typography, color scheme)
- Scene style (lighting, atmosphere, color tone)
Example Usage
Man @Image1 walks down a corridor after work, looking exhausted. His steps slow down. He stops at his front door, takes a deep breath to compose himself, searches for his keys, unlocks the door, and enters. His young daughter and a pet dog run toward him happily and hug him.
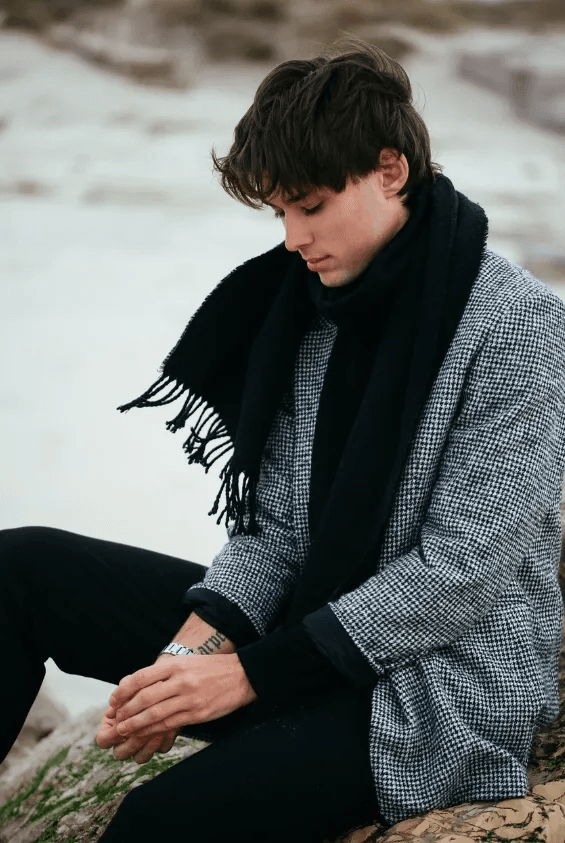
By referencing @Image1, the character’s appearance remains consistent throughout the entire sequence.
Capability 4: Precise Camera Motion and Action Replication
This is one of the most talked-about features of 2.0.
In the past, if you wanted AI to imitate cinematic camera movement, you either had to write a long list of technical terms and hope for the best, or it simply wouldn’t work.
Now it only takes two steps:
Upload a reference video that showcases the camera movement you prefer, then type:
“Reference the camera movement from @Video1.”
The model examines the camera techniques used in the reference video (such as push, pull, pan, track, orbit, zoom, continuous shot, etc.) and replicates that same movement style in your new content.
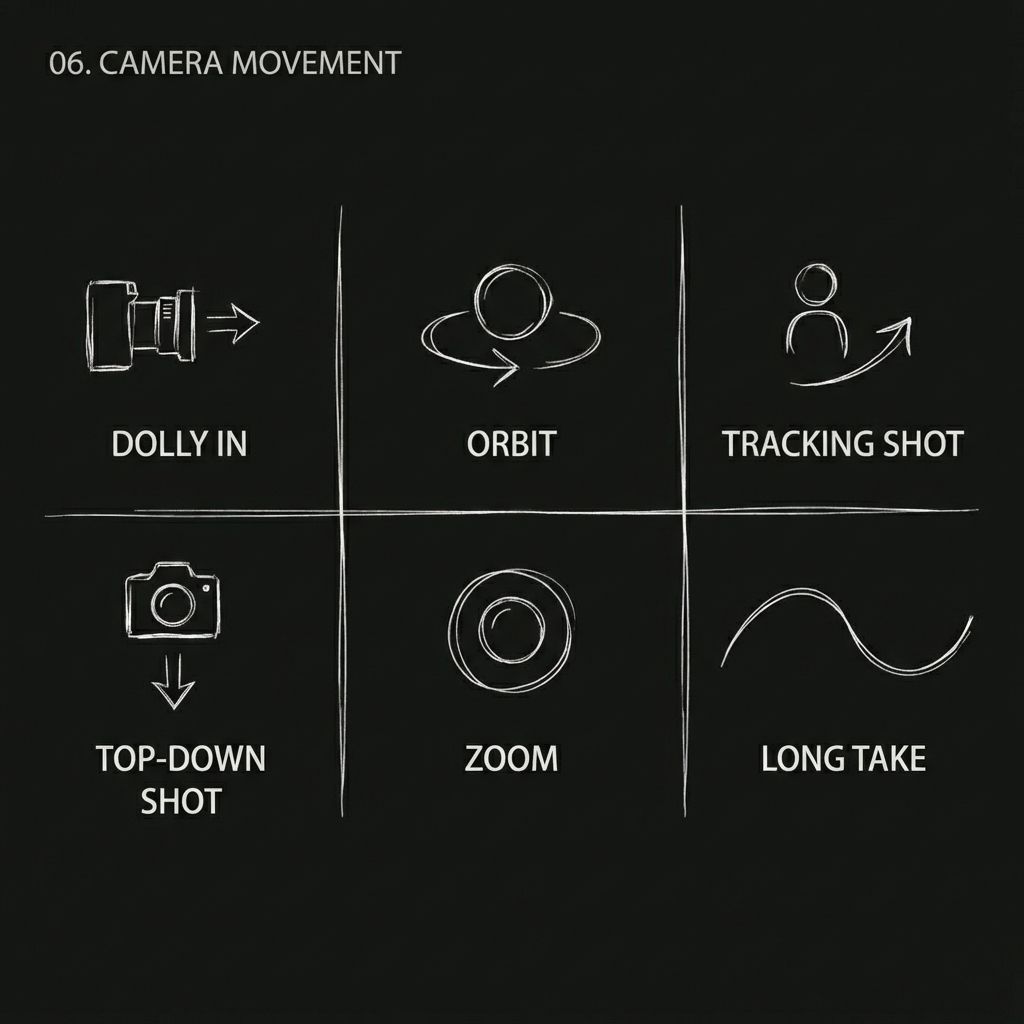
Camera Movements That Can Be Imitated:
- Hitchcock zoom
- Orbiting tracking shot
- One continuous take
- Tracking shots, push shots, pull shots, and pan shots
- Low-angle shot
- Overhead bird’s-eye view
Example: Recreating a Classic Wuxia Scene
Capability 5. Precise Recreation of Creative Templates and Effects
See a cool advertising concept, transition effect, or movie clip you like?
Upload it directly as a reference. The model can identify the motion rhythm, visual structure, and camera language within it, and help you recreate your own version.
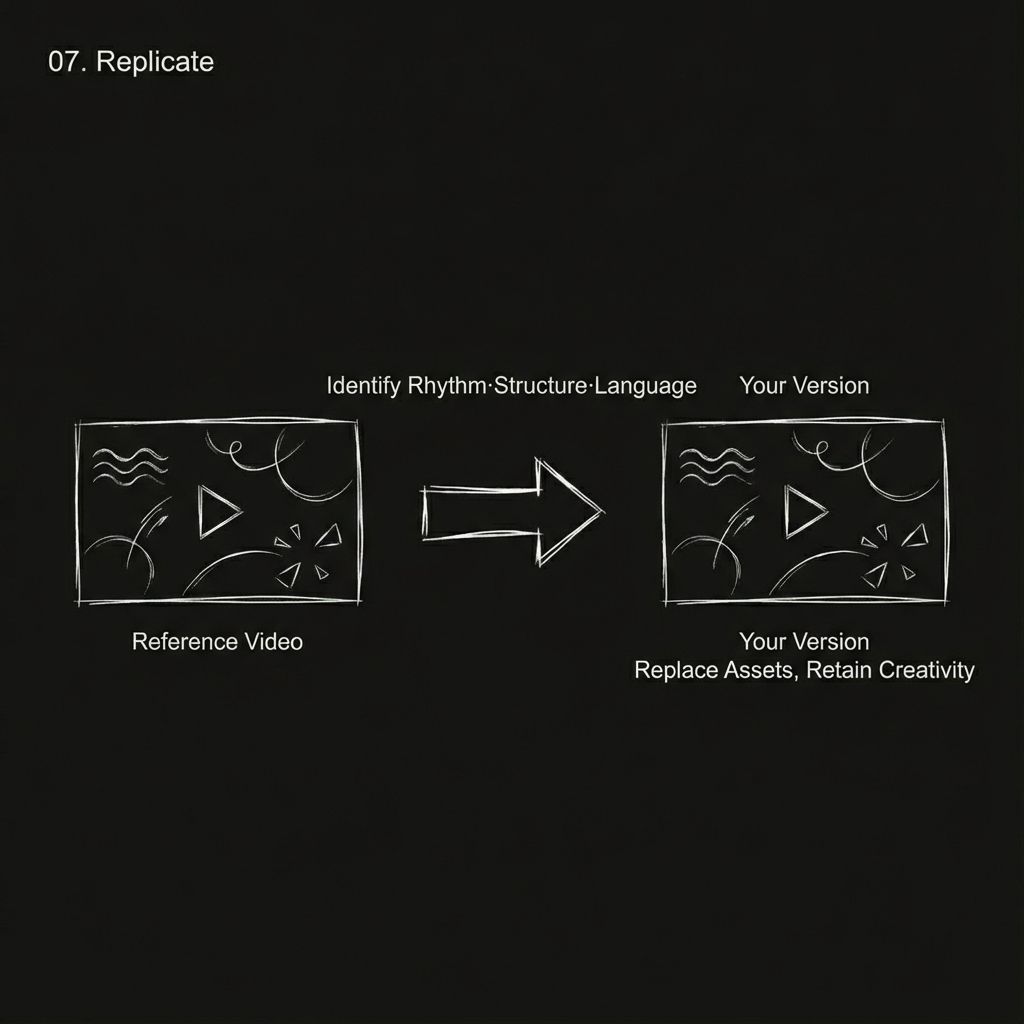
Categories of creative content that can be replicated:
- Creative transitions, such as puzzle shattering, particle dispersion, and iris-style portal transitions
- Finished advertisement styles
- MV-style rhythm editing
- Cinematic special effects shots
- Outfit transformation and face swap effects
Example:
Special effects fully maxed out…
Capability 6. Video Extension and Continuation
Already have a video you are happy with and want to keep the story going? Or maybe you want to add a backstory before the existing clip? The video extension feature handles both.
Extend forward
Upload your current video and type “extend @Video 1 by X seconds,” followed by a summary of the additional scenes you wish to create.
Extend backward
Write “extend X seconds before” and add a description of the earlier storyline you want to create.
Usage Rules
- Tell the model clearly: “extend @Video 1 by X seconds.”
- When generating, select a duration equal to the extension length. For example, if you want to extend by five seconds, choose five seconds as the generation length.
- You can include new plot elements and visual descriptions in the extension portion.
- Both forward and backward extension are supported.
Example Usage
By referencing images and videos, the original two-second clip above can be extended to fifteen seconds.
The extended portion can be described in detail, including camera movement, visual elements, and on-screen text.
Capability 7. More Realistic Audio
Videos generated by version 2.0 come with built-in sound effects and background music, and the overall audio quality has improved significantly compared to before.
Here are several audio-related use cases.
Voice tone reference
Upload a video or audio clip and let the model imitate the speaking tone or narration style from it.
Multilingual dialogue
Characters can speak Chinese, English, Spanish, Korean, and other languages. Emotional delivery is handled quite well.
Multi-character dialogue
A single video can feature multiple characters, each speaking their own lines. There are successful examples such as cat-and-dog talk shows, period drama dialogues, and tactical military conversations.
Dialect support
Some creators have successfully generated characters speaking in Sichuan dialect while ordering milk tea. The result feels surprisingly authentic.
Sound effect matching
Footsteps, thunder, crowd noise, equipment collisions, and other environmental sounds can all be generated with reasonable accuracy.
Capability 8. More Coherent One-Take Shots
A “one-take” shot requires the scene to remain continuous over an extended period while handling complex spatial transitions and camera movement. This has always been a difficult challenge for AI.
Seedance 2.0 has clearly advanced in this domain. When you upload various images from different scenes and describe it as, “a continuous tracking shot that follows a runner from the street up the stairs, through a corridor, onto the rooftop, and finally overlooks the city,” the model can seamlessly create natural transitions between scenes without noticeable interruptions.
For example, “from a first-person perspective, look through a plane window where clouds turn into ice cream, then pull the camera back into the cabin as the character picks up the ice cream and takes a bite.” More complex one-take sequences are also possible.
Even this kind of one-take sequence, involving perspective shifts and a blend of realism and fantasy, can be handled by Seedance 2.0.
The camera tracks a female agent in red moving through a crowd. She turns a corner and encounters a masked girl, then continues the pursuit into a mansion where the target disappears, all without a single cut. There are also spy-thriller style one-take scenes.
Achieving this level of narrative density in a continuous shot is already quite impressive.
Example Usage
@Image1 @Image2 @Image3 @Image4 @Image5, a continuous tracking shot that follows a runner from the street up the stairs, through a corridor, onto the rooftop, and finally overlooks the city.
Tip
Arrange multiple images in sequence. The model will present these scenes in order within the continuous shot.
Capability 9. AI Video Editing
Already have a video and do not want to start from scratch, but only modify part of it? You can now use an existing video as input and produce targeted edits.
Character replacement
Replace character A in the video with character B while keeping the original actions and expressions unchanged. For example, “replace the female lead singer in Video 1 with the male lead from Image 1, fully replicating the original movements.”
Plot reversal
Keep the scene and characters the same, but completely rewrite the storyline. Some creators have turned a romantic moon-viewing scene on a bridge into a dramatic twist where the male lead pushes the female lead into the water. Others have transformed a tense bar negotiation into a comedic moment where someone pulls out a huge bag of snacks instead.
Element modification
Adjust hairstyles, add props, or switch backgrounds. For example, “adjust the woman’s hairstyle in Video 1 to long red hair, and have the great white shark from @Image 1 slowly emerge halfway behind her.”
Brand integration
Insert brand elements into an existing video. For example, add a close-up of a paper bag with a brand logo in a fried chicken video.
Example — Character Replacement:
Recreate Black Myth: Wukong, then have him fight Captain America.
Capability 10: Beat-Synced Editing
Upload a rhythmic music video as a reference. The model can detect tempo changes and make scene cuts land precisely on the beat.
Basic Beat Sync
Upload image materials and a music reference video, then write:
“Sync the visuals to the rhythm of @Video.”
Dynamic Beat Sync
Write:
“Make the characters more dynamic, enhance the overall dreamy visual style, increase visual tension, and adjust shot scale as needed based on the music.”
Landscape Beat Sync
When combining multiple landscape images with music, write:
“Landscape scenes reference the rhythm of @Video and sync transitions with the visual style and music beats.”
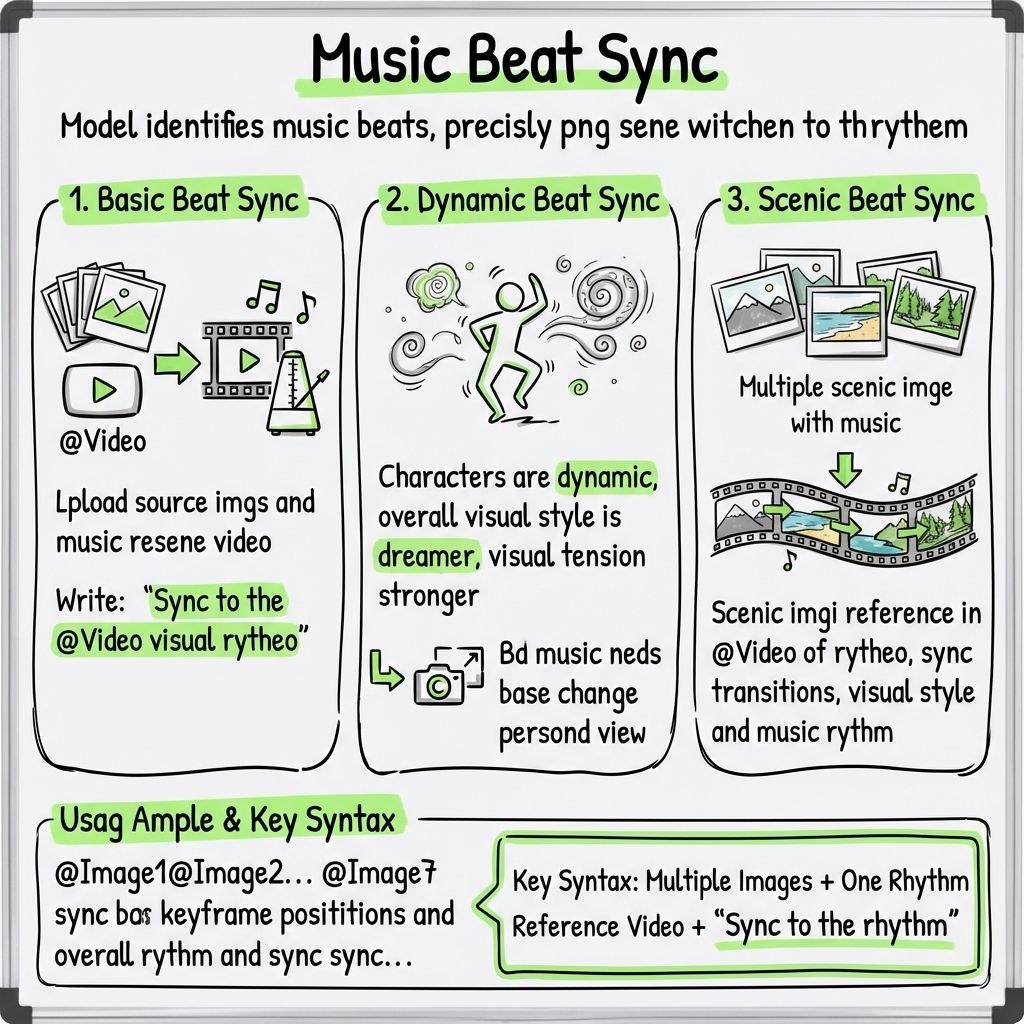
Example Usage
@Image1 @Image2 @Image3 @Image4 @Image5 @Image6 @Image7
Sync these images according to the keyframe positions and overall rhythm of @Video. Make the characters more dynamic and give the overall visual style a more dreamy look.
Key Formula
Multiple images + one rhythm reference video + “Sync to the rhythm.”
Capability 11. More Convincing Emotional Performance
Stiff facial expressions and awkward emotional transitions have long been common issues in AI-generated video. Version 2.0 shows clear improvement in this area.
You can upload a video as an emotional reference and let the model imitate the expression changes from it. For example, “the woman in @Image 1 walks to the mirror, pauses in thought, then suddenly breaks down screaming. The action of grabbing the mirror and the emotional intensity of the breakdown should fully reference @Video 1.”
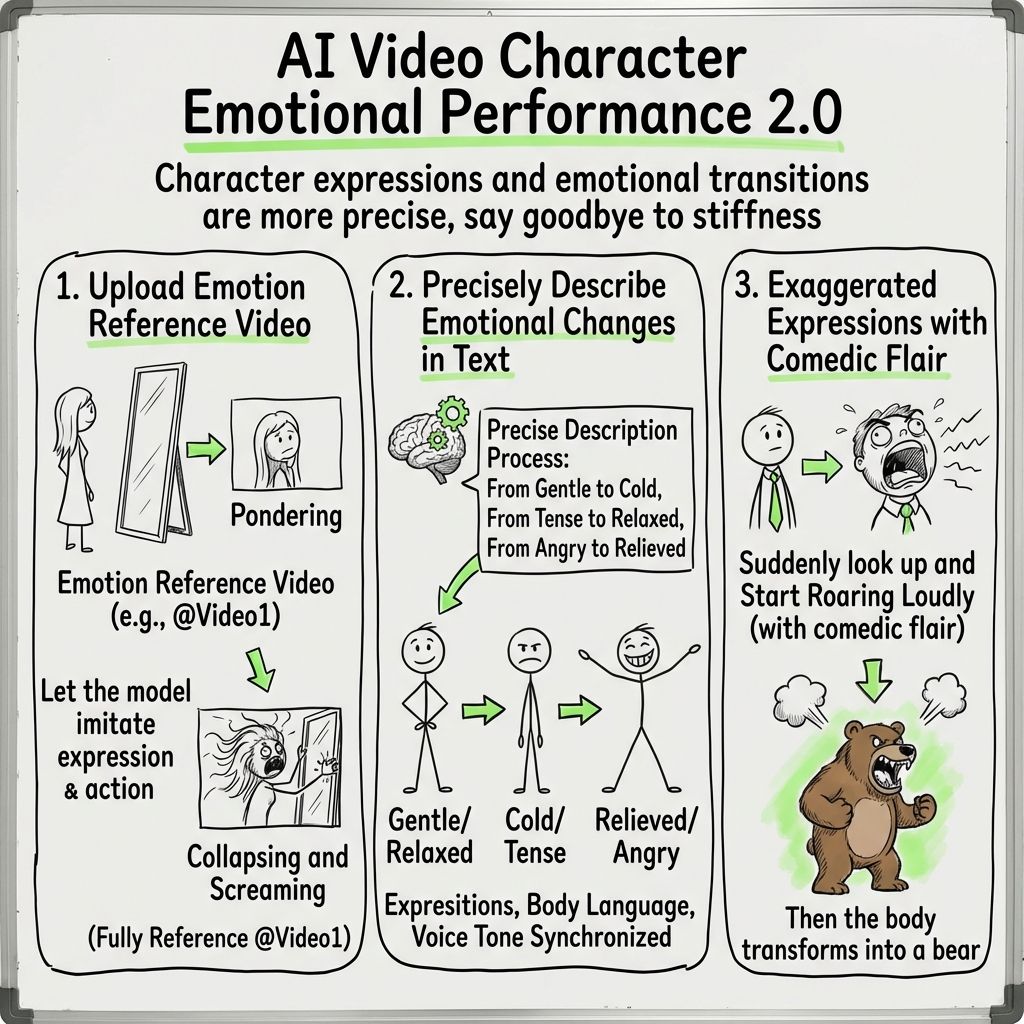
You can also describe emotional transitions precisely in text. For example, shifting from gentle to cold, from tense to relaxed, or from anger to relief. The model can understand these emotional changes and reflect them through facial expressions, body language, and vocal tone.
For example, “the character suddenly looks up and begins shouting loudly.” It can even handle exaggerated expressions with a comedic tone.
Try Seedance 2.0 on Van Gogh Studio
Ready to put these workflows into practice? Open Seedance 2.0 on Van Gogh Studio, upload your references, assign roles with “@”, and generate your first multimodal clip.
If you want a wider model choice after Seedance, keep iterating in the same workspace with Image to Video, AI Video Studio, and video editing.
Create AI videos free
Try Van Gogh Studio free — text-to-video, image-to-video, and 300+ models in one place. Free credits on signup, no credit card required.
Try Free Video Generator