One of the latest and greatest features to be added to the Kling AI video generation platform is called Elements. This feature allows users to upload images of various elements to include in their videos, like characters, objects, and even backgrounds, and then produce videos featuring those exact elements.
If you're one of them, don't worry! In this guide, we’ll look at how to leverage Kling AI Elements, with simple step by step instructions. But some users may notice it difficult to leverage this feature.
What Is Kling AI Elements?
Before we get into the step-by-step of how to apply Elements on Kling AI, let’s first take a look at what this feature is.
In simple terms, Elements gives you a way to create greater consistent AI videos featuring the exact characters and objects you want. You can upload images (up to four images in total) of what you want to see in your videos. It might be images of a scene, a person, or just a random item, like a mug or car, and then use the image-to-video tool to create a video.
The video you make will include all of those different elements, and you can then persist with them for more and more creations. This allows you to make entire series of videos that are all consistent with one another, featuring the same characters and settings and objects. It works on its new model Kling: 1.6.
Input
Output video


Prompt:
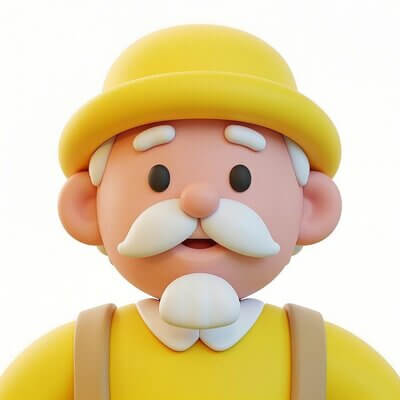
Prompt: In a café, a cartoon-style elderly man lifts a cup to drink coffee.
How to Use Elements in Kling AI
Now you know the basics of Kling AI Elements, let’s take a look at how, exactly, you can go ahead and apply this feature for yourself to build some extraordinary AI videos. Here are step-by-step instructions to using this tool, complete with handy screenshots that reveal you where to click and what to press.
Step 1. Access the Elements Tool
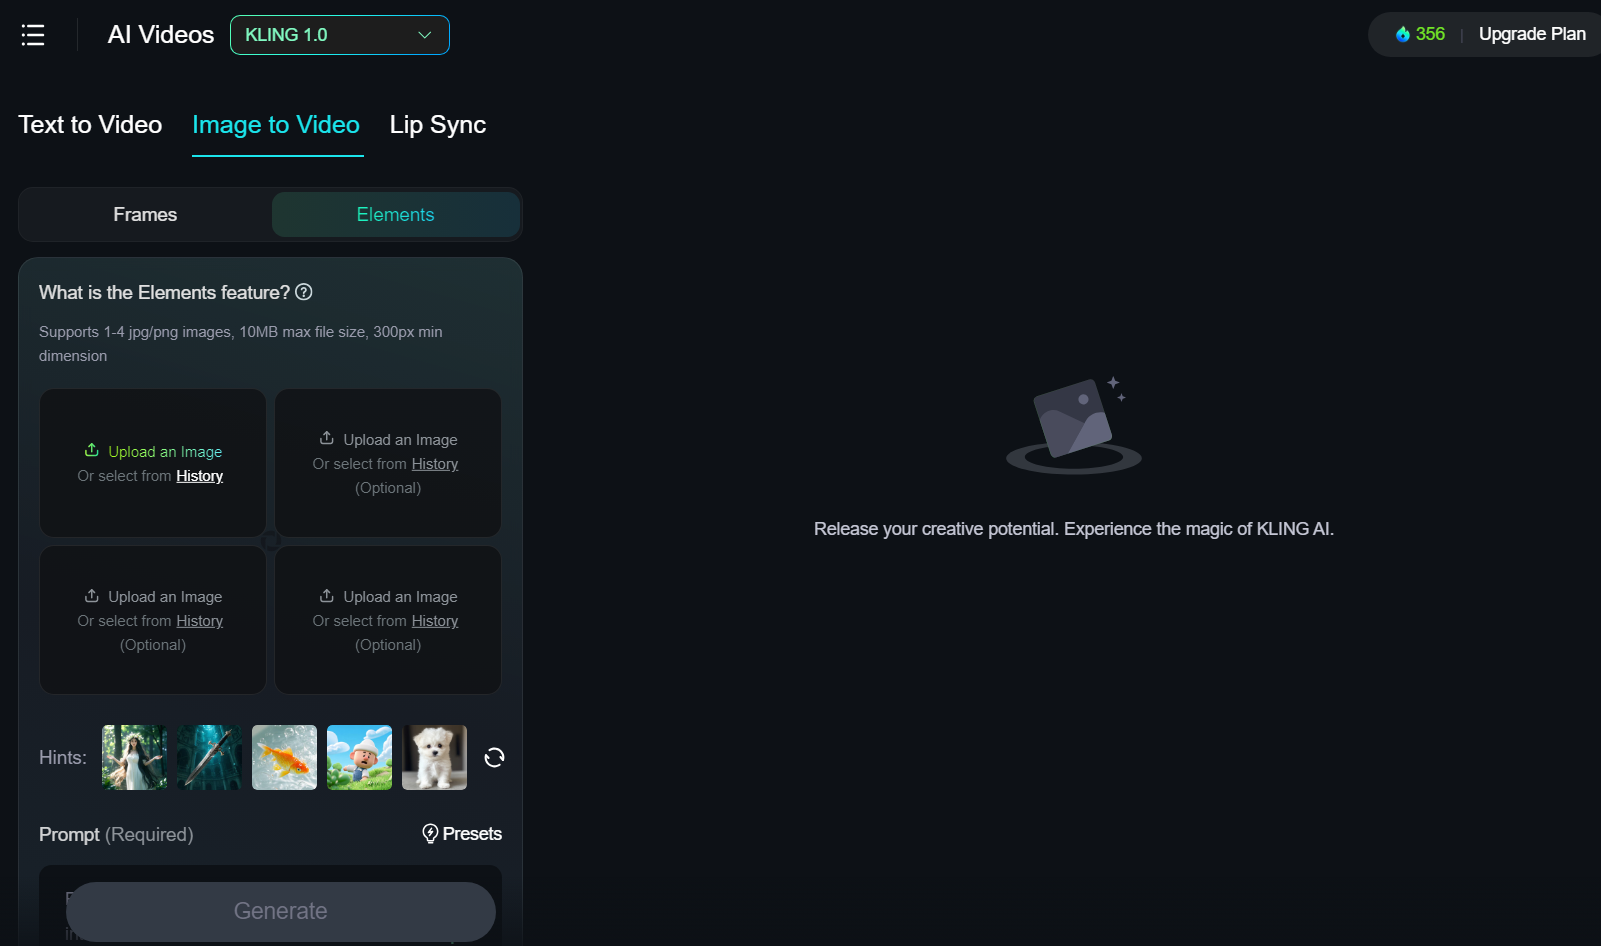
On the Kling AI dashboard, select AI Videos, then navigate to the Image to Video tab and choose “Elements” to utilize this feature.
Step 2. Upload Your Elements
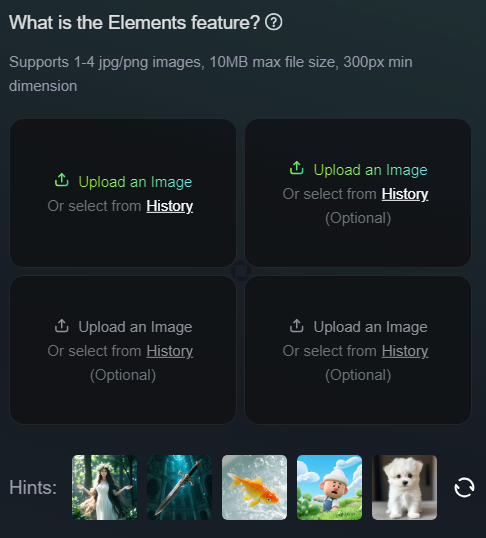
Press the “Refresh” button to get new options, and choose up to four elements in total. To leverage Elements, you’ll require to upload or select some images of the elements you wish to include in your video. You can either upload your own images, generate AI images using Kling AI, or select from any of the pre-generated options that Kling AI provides for you.
Step 3. Enter a Prompt
Just type in whatever you want to see, making sure to mention each of the elements, so the AI knows what to do with them. You’ll also demand to enter a prompt that tells the AI what your video should involve and include. If you choose to apply AI-generated elements, Kling will build up a prompt for you, but you’re free to delete it and enter your own or edit it, as desired.
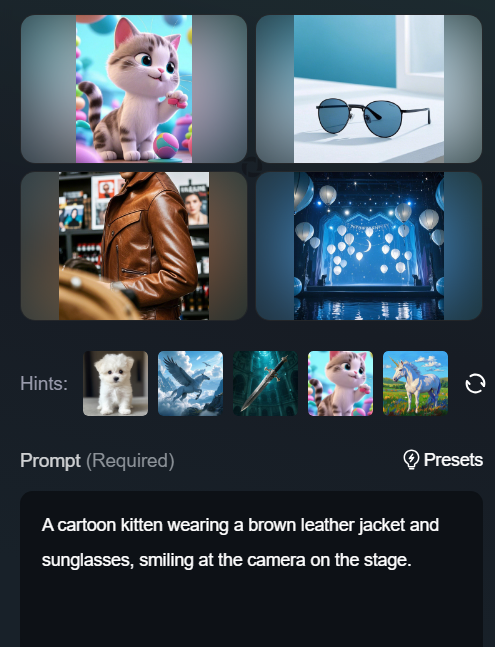
Step 4. Configure Your Video Settings
Next, just like when you produce regular AI videos in Kling, you can adjust the various settings to configure how your video looks. You can choose between Standard and Professional Mode, for example, where Professional Mode gives you better quality results but may take a bit longer for the video to generate.
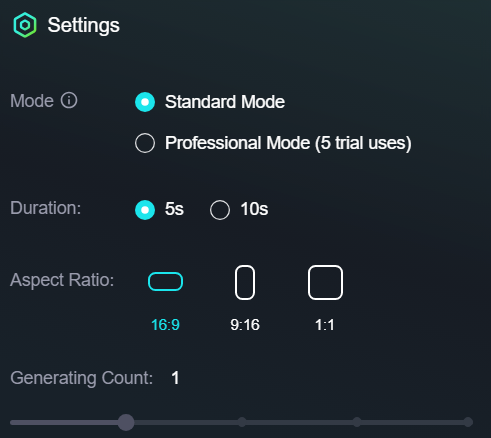
You can also choose the duration of your video, either five or 10 seconds, and choose from three different aspect ratio options, 16:9, 9:16, and 1:1. Set all the options exactly as you want them before proceeding to the next steps.
Step 5. Enter a Negative Prompt (Optional)
You can also choose to enter a negative prompt, should you want to do so. This is completely optional, so you can just skip this part and go straight to generating your video, if you prefer. But, if you want the primary control over your video creations, it’s best to add a negative prompt which tells the AI what not to include in the video.
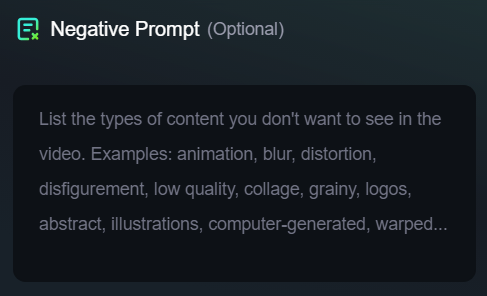
Step 6. Generate Your Video
Once you've configured all the settings, added your elements, and entered your prompt(s), you can click the Generate button to build your video. It will demonstrate you how many credits the process will cost, and you may have to wait a little although for the video to generate, depending on which membership plan you’re subscribed to.
The Value and Uses for Kling AI Elements
That’s how to leverage Kling AI Elements, but you might be wondering around what value, benefits, and usage opportunities this new feature opens up.
Well, on Kling AI, a lot of users are excited about this feature, as of how much easier it will create it for them to create truly consistent AI videos. In the past, you had to just rely on either its image-to-video technology or reusing the same style prompts over and over to get videos that looked similar to one another.
regularly, even with these methods, users ended up with videos that had some similarities, but with characters, subjects, and backgrounds that were not entirely consistent. This made it really difficult for them to build series or sequences of videos that they could combine together in a natural narrative flow.
Elements from Kling AI changes all of that. With this feature, you can preserve the same backgrounds, the same settings, the same characters and objects in every video you create. That makes it a lot easier to create multiple clips that all flow naturally together, which opens a lot of opportunities for long-form AI video creation.
Users can utilize Kling AI’s Elements, for example, to support them craft lots of clips with the same characters and then tie them together into feature-length videos. It’s also strong for brands and businesses that might want to insert their own products or even mascots into AI videos and build multiple videos featuring those elements.
Best Practices for Using Elements in Kling AI
As you can see, there’s a lot to love around the Kling AI Elements feature and a lot of value it brings to the table. But, to build the strongest of this feature, there are some important best practices and useful tips to keep in mind:
- Upload the top high quality images of your elements.
- produce sure that the subject of each image is evident, without any distractions around it.
- leverage detailed and informative prompts to get the video output you desire.
- Remember to configure all relevant settings, like aspect ratio, etc.
- Add negative prompts regularly to get extra control over your video output.
- If you don’t get the desired results, leverage alternative pictures of your elements.
Try a Better Consistent Character Video Generator
If you're looking for a reliable tool to generate consistent character video, we suggest you experiment with Van Gogh Studio.
Van Gogh Studio offers a consistent character video generator with flexible customization, improved convenience and higher quality. You can easily create a video that can perfectly maintain the consistency of your uploaded characters or elements with just a few clicks.
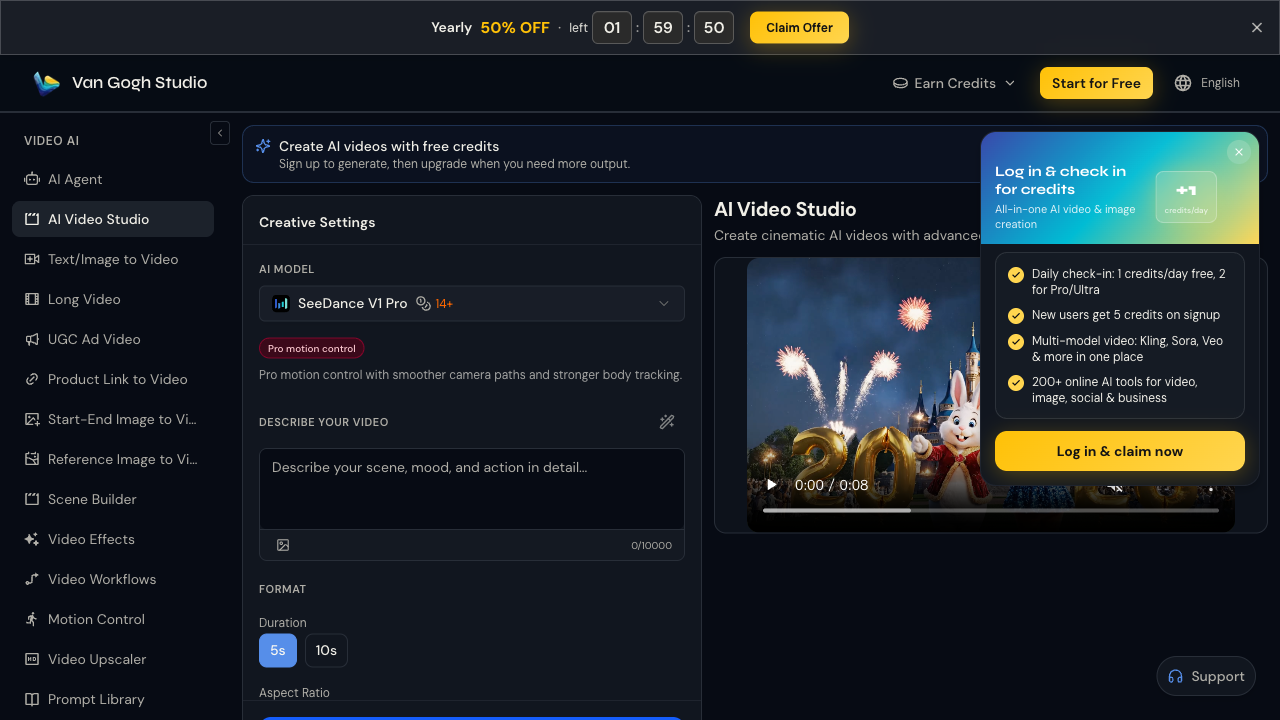
Van Gogh Studio is a prominent AI video generator that provides comprehensive access to various AI video models from a single platform. With this platform, you can utilize and explore numerous well-known models, including Kling AI, Luma AI, Runway, Hailuo AI, Vidu AI, Luma AI, and PixVerse AI.
Van Gogh Studio also excels in terms of feature comprehensiveness. In addition to standard video generation capabilities like text to video AI and image to video AI, Van Gogh Studio offers advanced digital human generation features such as AI avatar and AI product avatar.It also includes a dedicated AI short video generator designed to create short videos tailored for social media entertainment.
Van Gogh Studio also provides various AI video generation tools, plus time-saving video effects and a plethora of useful AI tools to create and enhance your AI videos in all sorts of ways. Here you can see a video talking about how to create AI kissing and hug videos using Van Gogh Studio, two of the video effects available:
It’s free to get started, too, so test out Van Gogh Studio today!
Create AI videos free
Try Van Gogh Studio free — text-to-video, image-to-video, and 300+ models in one place. Free credits on signup, no credit card required.
Try Free Video Generator