AI melt videos are oddly satisfying: people, objects, or scenes drip away like wax. On Van Gogh Studio, the Melt it Video Effect turns a still photo into that look in a few clicks—no timeline editing, no particle systems to learn.
Use this guide to run the full Van Gogh Studio workflow, pick better source photos, avoid mushy outputs, and connect Melt it with Explode it and other tools for a content series.
What Is the AI Melt Effect?
Melt it is a Video Effects template that uses image-to-video to animate melting physics on your subject. Upload a clear photo; the model softens structure, drips material downward, and keeps early frames recognizable before the dissolve.
Works well on portraits, products, food, or simple scenes with a strong silhouette. Soft, well-lit photos usually melt more cleanly than heavy motion blur.
How to Use Melt it on Van Gogh Studio
Step 1: Open the Melt it Effect Page
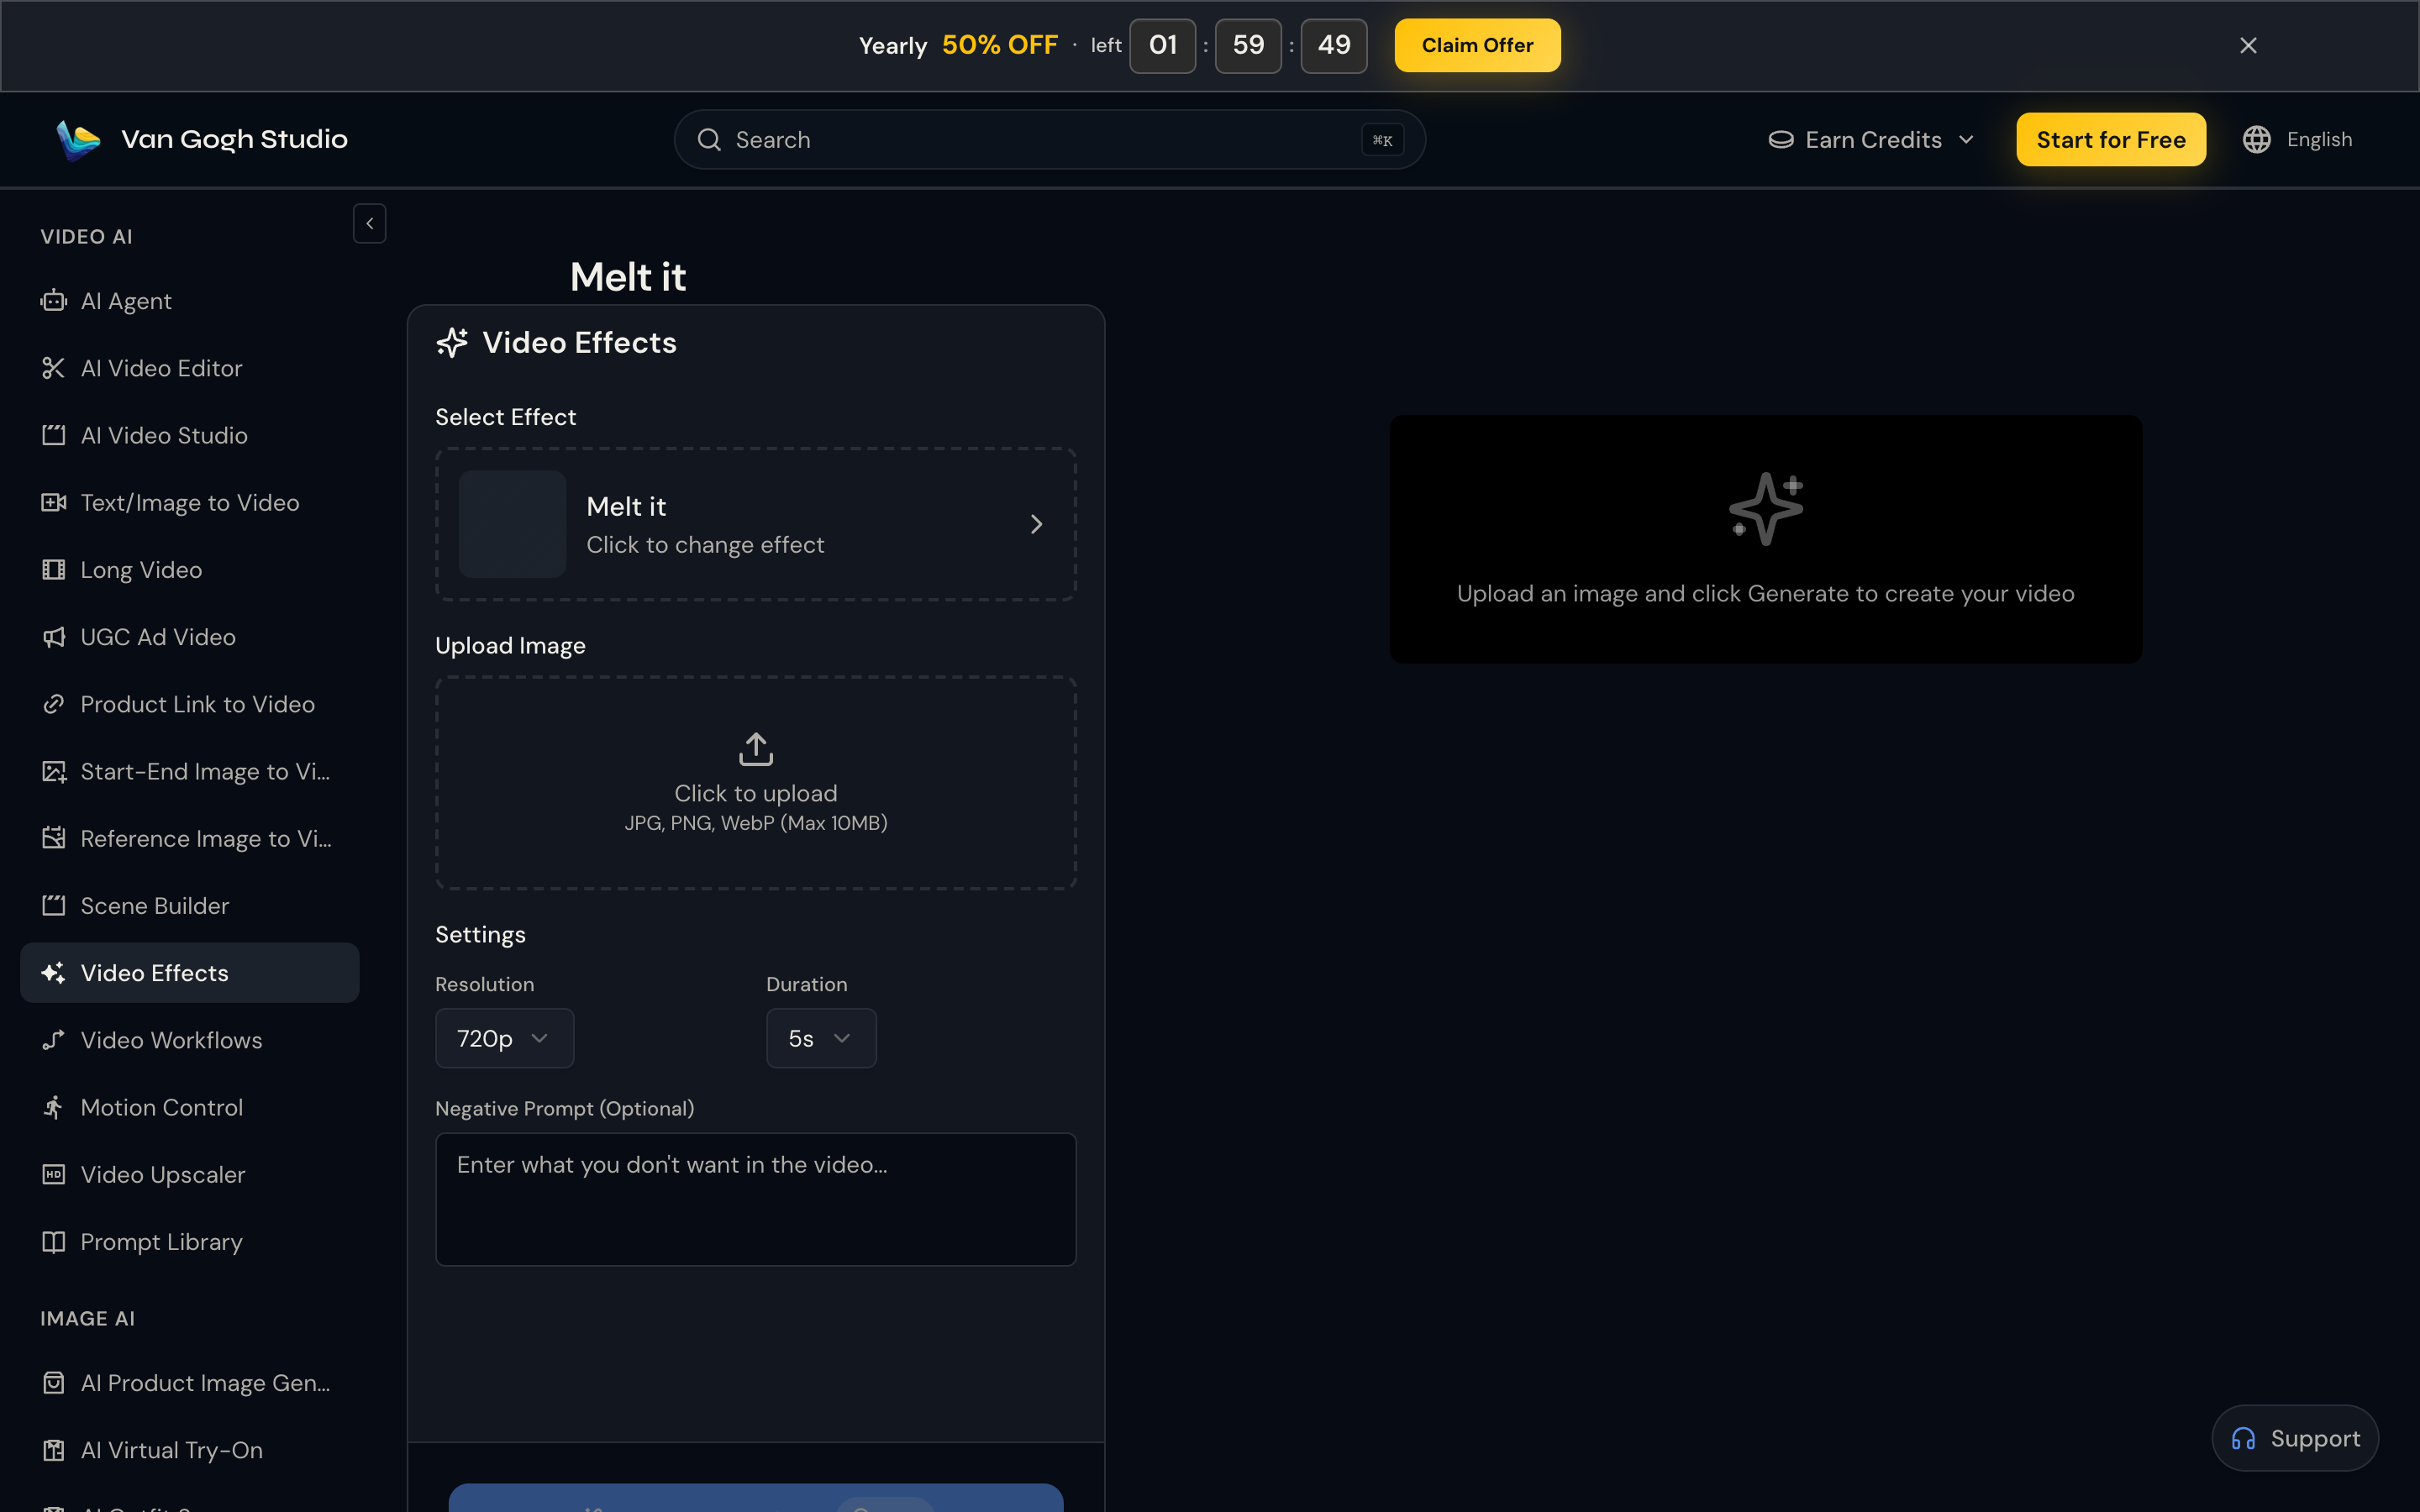
Go to Melt it (or browse Video Effects and search Melt). Confirm Melt it is selected under Select Effect.
Step 2: Upload Your Image
Click Upload Image (JPG, PNG, or WebP, max 10MB). Prefer a sharp subject that fills a good portion of the frame.
Best inputs:
- Strong silhouette (person, bottle, sculpture, dessert)
- Even studio or daylight lighting
- Minimal clutter behind the subject so drips stay readable
Step 3: Choose Resolution, Duration, and Optional Negative Prompt
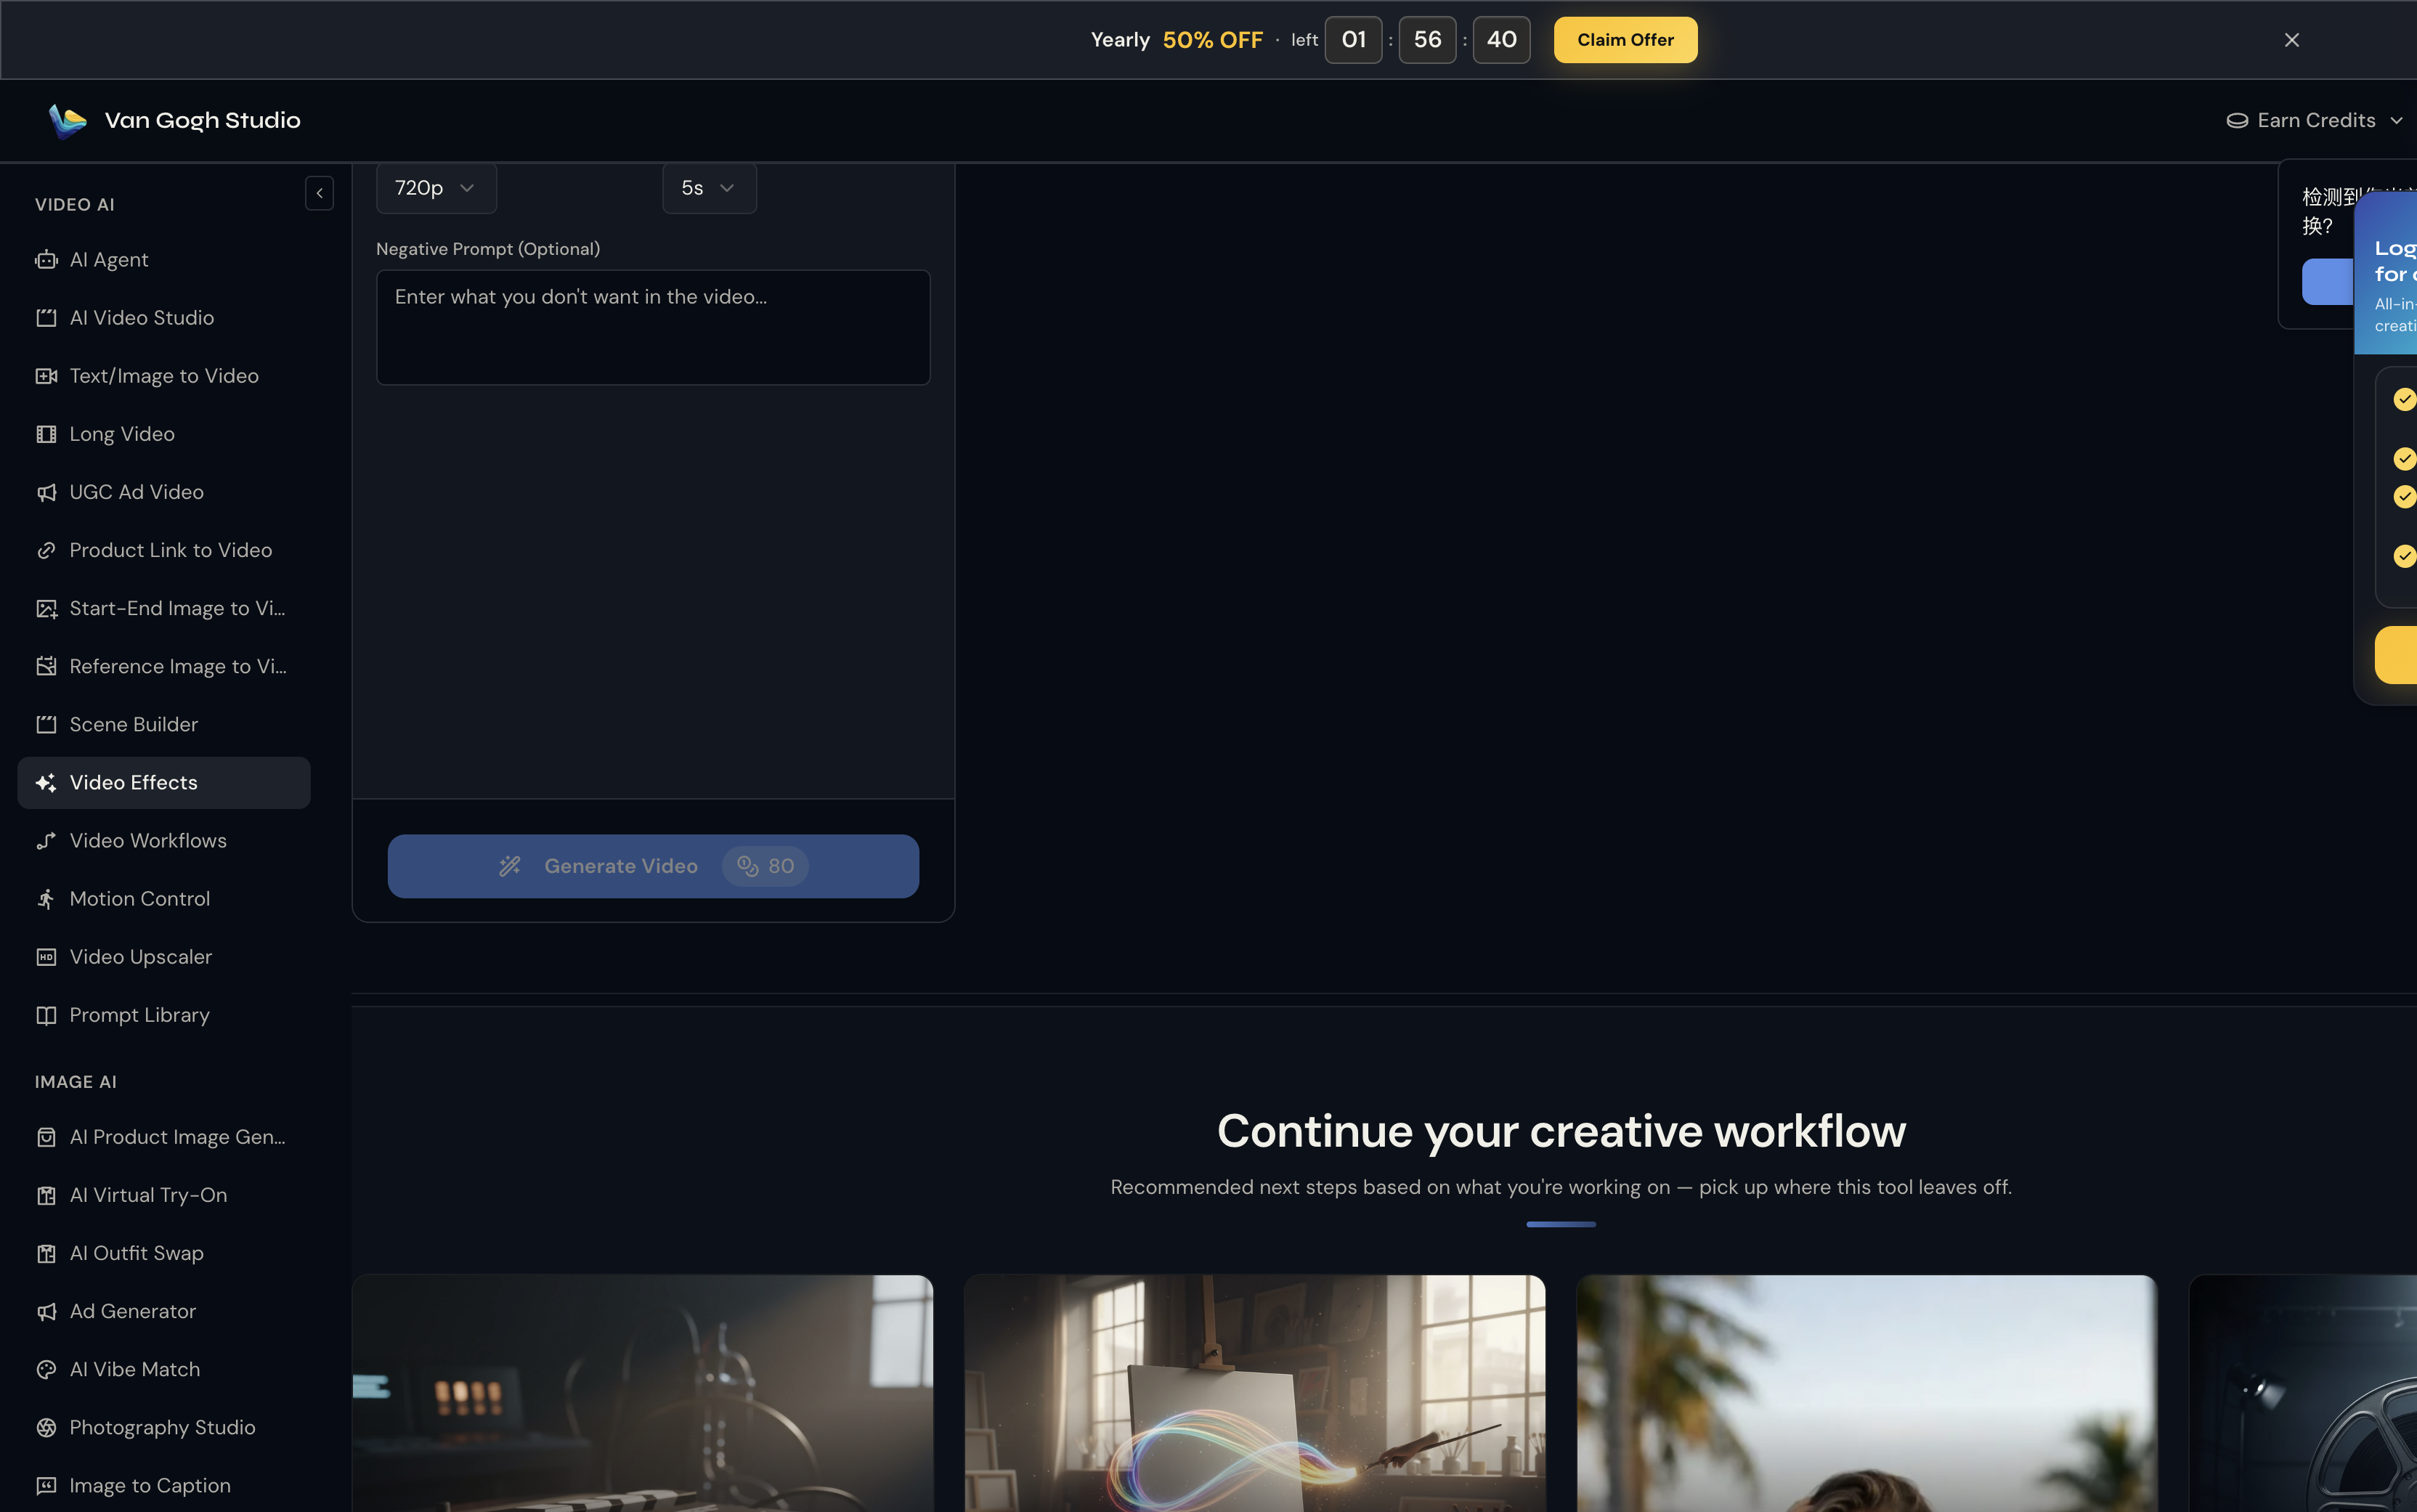
Template motion is pre-baked. Adjust:
| Setting | Recommended starting point | Notes |
|---|---|---|
| Resolution | 720p | Solid default for Reels / TikTok |
| Duration | 5s | Longer durations can feel like a slower drip |
| Negative prompt | cartoon, muddy colors, extra fingers, watermark | Use when faces warp or colors smear too hard |
Step 4: Generate and Download
Click Generate Video, preview, then download. Swap the photo or tweak the negative prompt for variants.
Tips for Cleaner Melt Clips
- Start readable, end gooey. The first frames should still show what is melting—that recognition is half the joke.
- Food and objects often outperform faces. Desserts, candles, phones, and toys melt more cleanly than extreme close-ups of teeth or hands.
- Pair with audio. Soft drip, candle hiss, or lo-fi ASMR beds increase average watch time.
- Batch variants. Same subject, three lighting photos → three melts for A/B posting.
- Chain effects. Post Melt it after Explode it as a “destruction duology.”
Common Mistakes
- Using dark, noisy night photos that turn to muddy sludge
- Cropping so tight the melt has nowhere to drip
- Fighting the template with a long custom story prompt (use Text/Image to Video for freeform melt scenes)
- Expecting audio baked in—add SFX after download
Related Effects and Tools
- Explode it — particle blow-up clips
- Video Effects — browse the full library
- Text/Image to Video — freeform melt scenes beyond the template
- AI Video Studio — general generation workspace
- AI Agent — structured multi-beat videos when a single melt isn’t enough
The Last Word
Open Melt it, upload a photo, generate, and share a wax-melt clip in minutes. Start free on Van Gogh Studio.
FAQs
Is Melt it the same as a freeform text-to-video melt prompt?
No. Melt it is a prebuilt Video Effects template. For custom melt stories (environment, camera, timing), use Text/Image to Video.
What photos melt best?
Sharp, well-lit subjects with clear silhouettes—portraits, products, food, and simple objects. Avoid tiny subjects in busy backgrounds.
Can I use Melt it for product marketing?
Yes—many brands use melt comedy for snacks, candles, summer drinks, or “heatwave” campaigns. Keep claims playful and platform-safe.
How long should a melt clip be?
Start at 5 seconds. That length is enough for recognition + drip payoff on TikTok, Reels, and Shorts.
Create AI videos free
Try Van Gogh Studio free — text-to-video, image-to-video, and 300+ models in one place. Free credits on signup, no credit card required.
Try Free Video Generator